Introduction
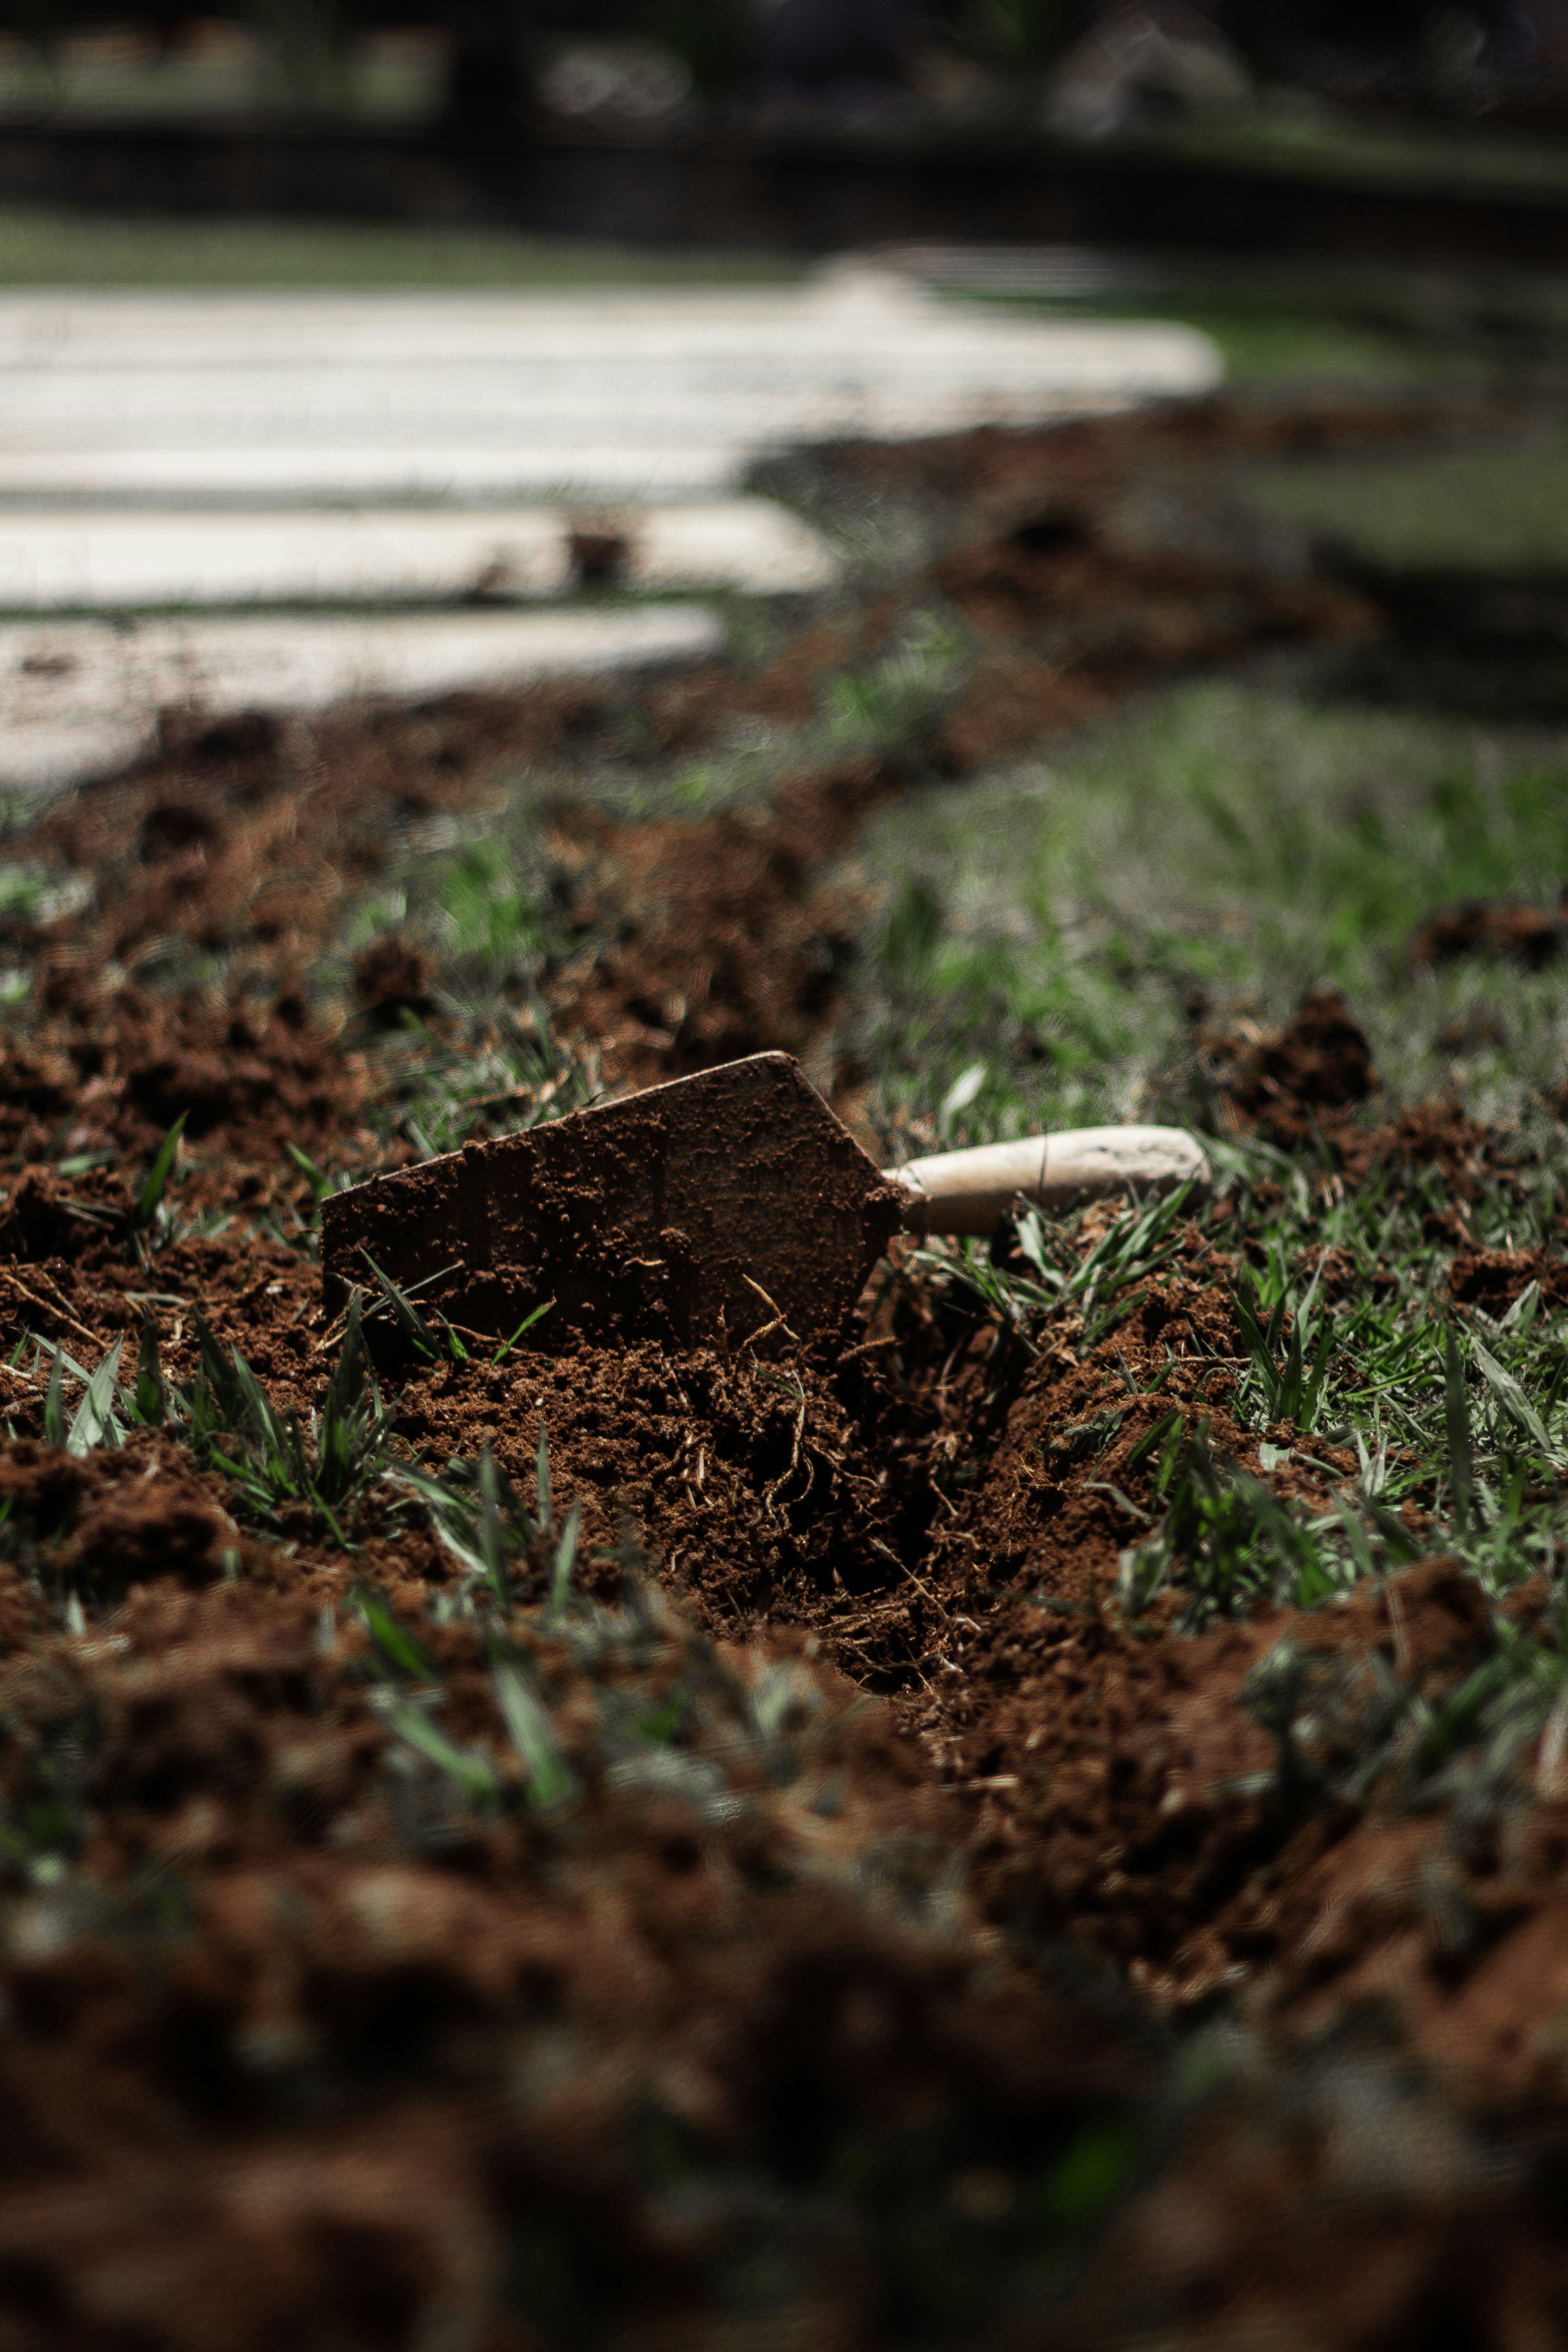
Soil is not dirt. That distinction matters more than it might seem. Dirt is the stuff on your shoes. Soil is a living system, a dense web of minerals, organic matter, water, air, bacteria, fungi, worms, and organisms too small to see, all working together in ways that directly determine what you can grow and how well.
Most people approach gardening from the top down: choosing plants, watering, dealing with pests. But the plants that struggle, the ones that never quite thrive, the ones prone to disease, the ones that produce poorly, are usually responding to conditions underground. Fix the soil and much of the rest follows.
This page is a reference for understanding what healthy soil actually is, what it's made of, how pH and nutrients work, and which amendments do what. Whether you're starting a new bed from scratch or trying to improve ground you've been gardening in for years, the information here is meant to give you a clear foundation rather than a list of products to buy.
Foundations
What Soil Actually Is
Healthy topsoil is roughly 45% mineral particles, 5% organic matter, 25% water, and 25% air. Those proportions aren't fixed; they shift with weather, season, and how the soil is managed, but they give a useful picture of what soil is and why all four components matter.
Mineral particles
The mineral fraction of soil is made up of three particle types: sand, silt, and clay. Their relative proportions determine what's called soil texture, one of the most fundamental characteristics of any soil, because it governs how water moves through it, how well it holds nutrients, and how easy it is to work.
| Particle | Size | What it does well | Where it falls short |
|---|---|---|---|
| Sand | Largest | Drains quickly, warms fast in spring, easy to work | Holds little water or nutrients, dries out fast |
| Silt | Medium | Retains moisture well, reasonably fertile | Compacts easily, can crust over when dry |
| Clay | Smallest | High nutrient-holding capacity, retains moisture | Drains poorly, compacts severely, slow to warm |
| Loam | Mixed | Balanced drainage, moisture, and fertility, the gardener's ideal | Rarely found without some amendment or luck |
Organic matter
Despite making up only a small fraction of soil by volume, organic matter has an outsized effect on nearly every soil property. It improves structure in both sandy and clay soils, feeds soil microbes, retains moisture, releases nutrients slowly as it breaks down, and buffers soil pH against wild swings. A soil with 5% organic matter behaves meaningfully differently from one with 1%.
Organic matter is constantly being consumed by soil life and needs to be continuously replenished. This is the core argument for regular composting: not just adding fertility, but maintaining the organic content that makes everything else work better.
The living component
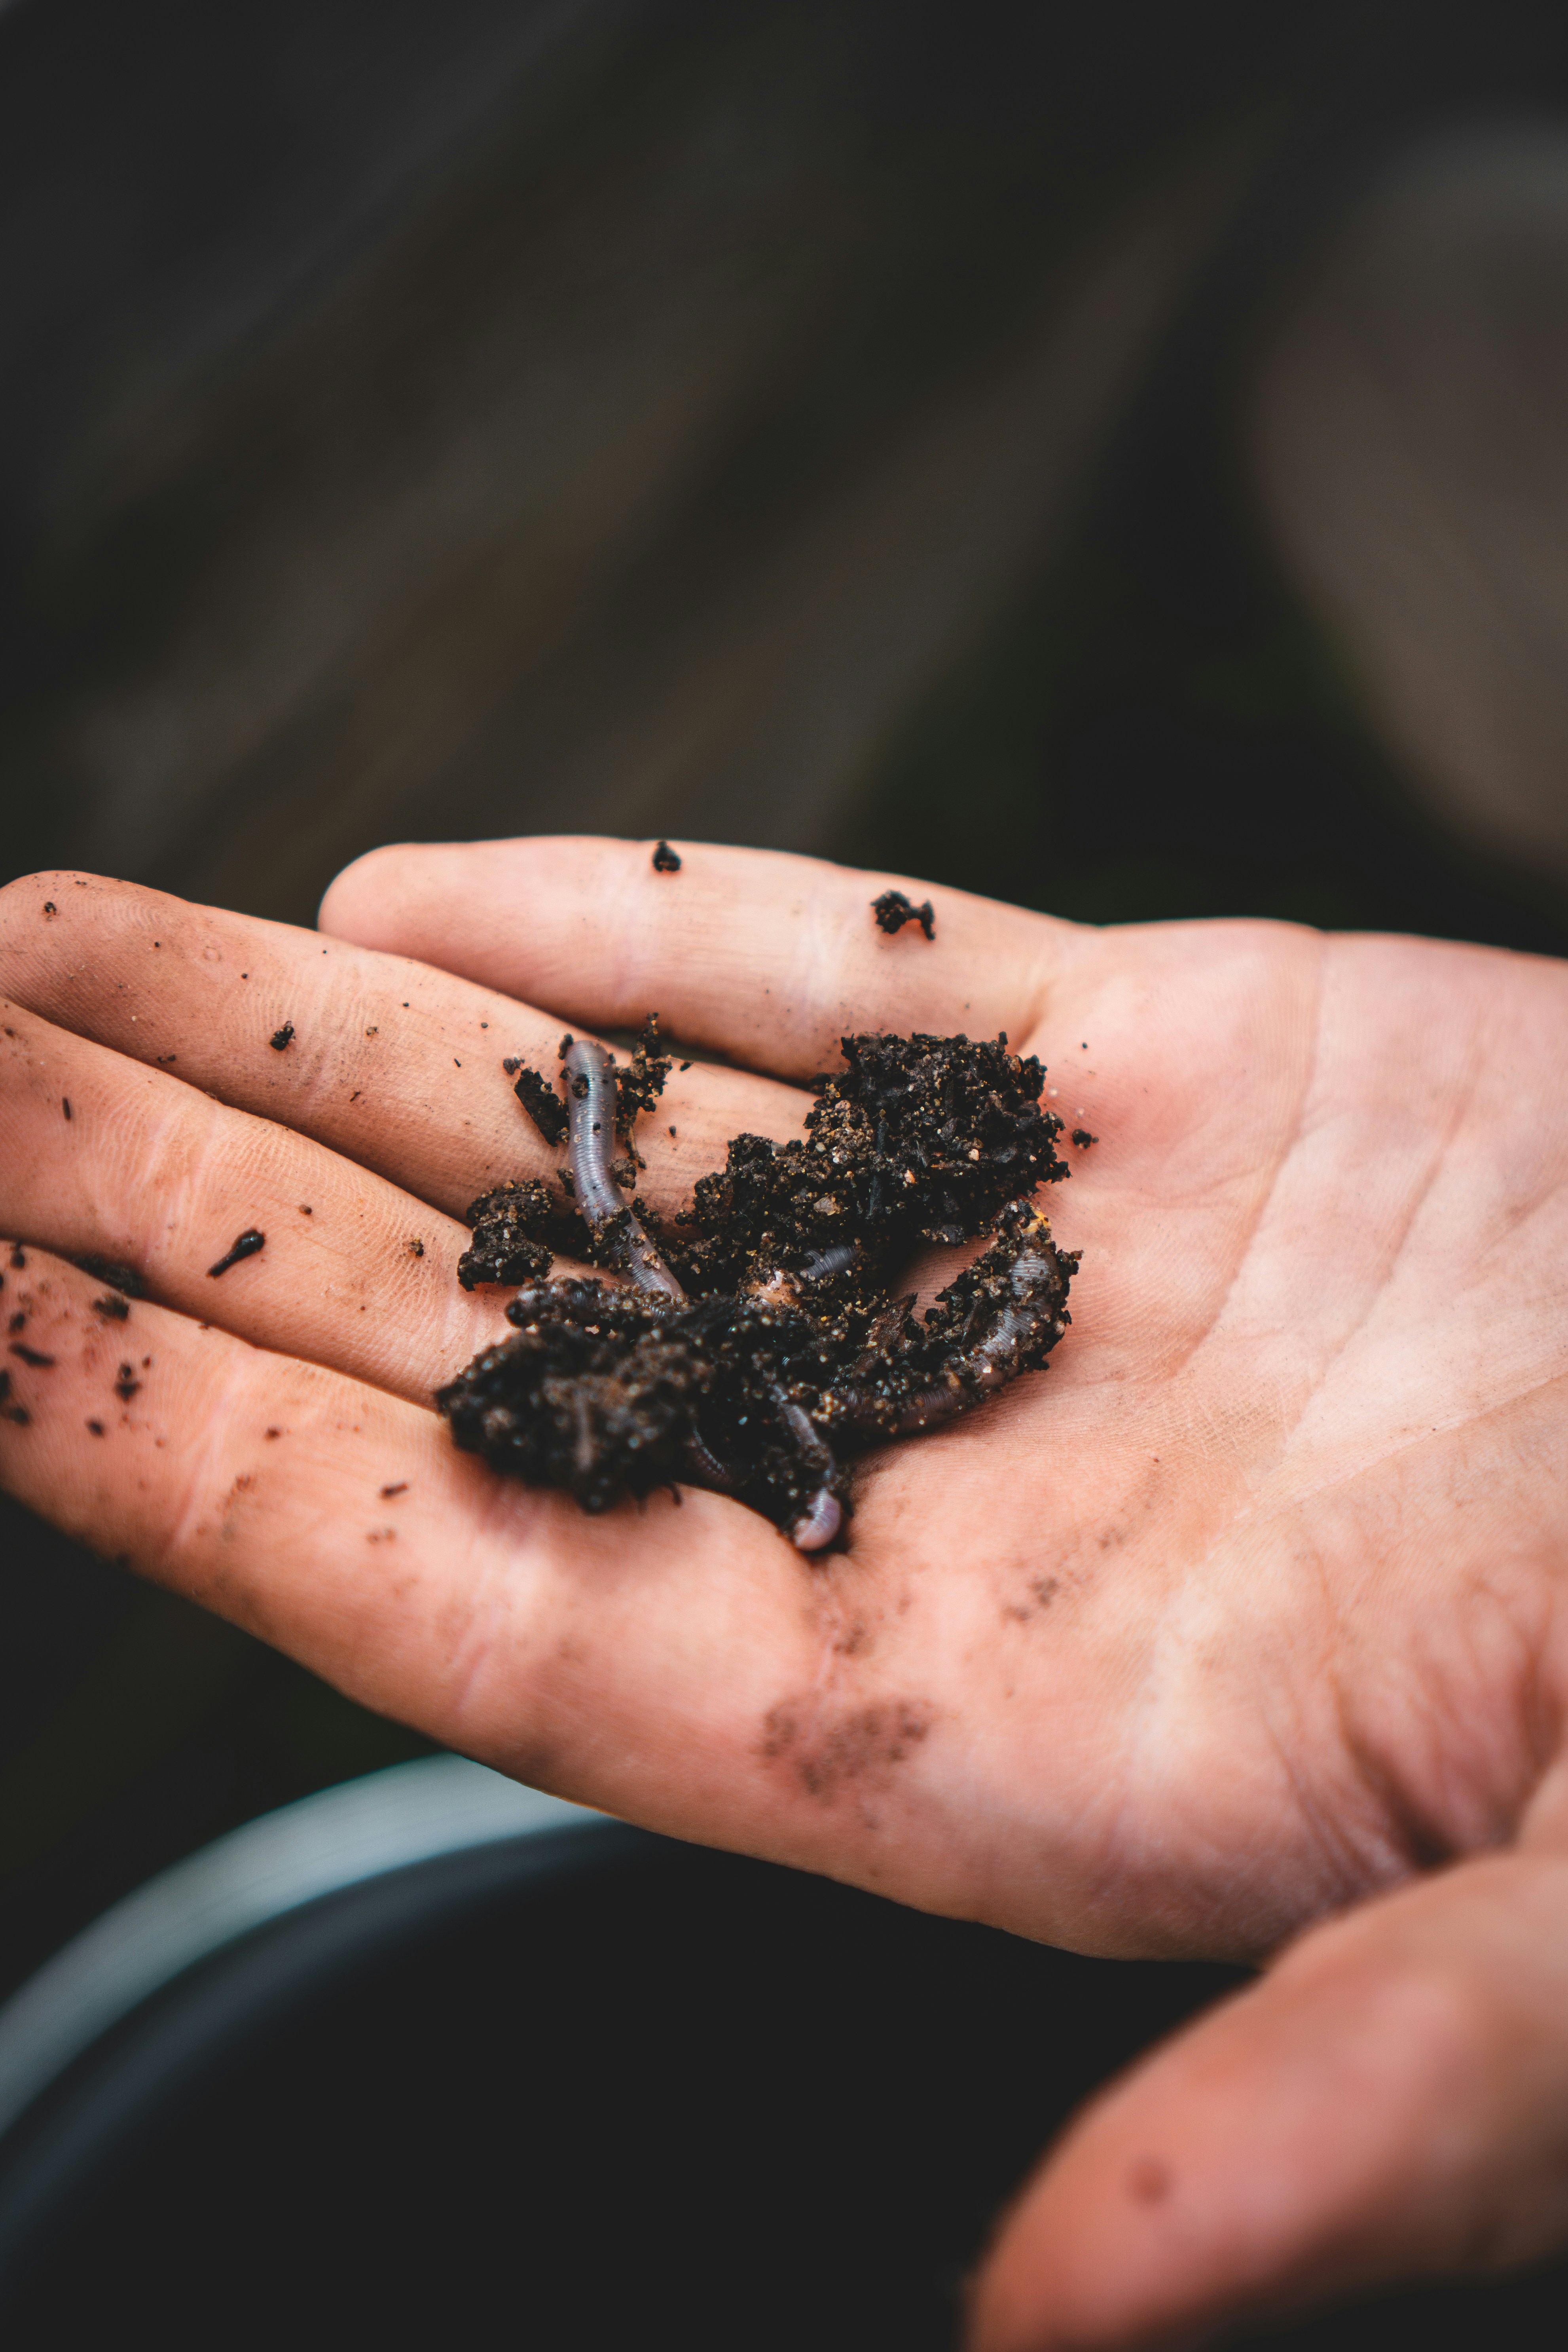
A single teaspoon of healthy garden soil can contain billions of bacteria, hundreds of metres of fungal threads, and thousands of protozoa. These organisms are not incidental; they are central to how soil functions. Bacteria break down organic matter, releasing nutrients for plant uptake; certain specialised groups also fix atmospheric nitrogen directly into forms plants can use. Fungi extend the reach of plant roots and trade minerals for sugars. Earthworms physically move and aerate the soil while depositing nutrient-dense castings.
Practices that disrupt this web, heavy tillage, synthetic fertiliser overuse, leaving soil bare, set back the biological activity that underpins fertility. Practices that support it, minimal disturbance, mulching, composting, build it over time. The soil biology is not separate from the gardening; it is the gardening.
Air and water
Soil needs to be porous enough to hold both air and water in the spaces between particles. Roots need oxygen to function, waterlogged soil essentially suffocates them. Compacted soil lacks the pore space for both, which is why heavy foot traffic and machinery are so damaging. Keeping paths defined and beds permanently undisturbed goes a long way toward preserving the structure that allows air and water to coexist at the root zone.
Chemistry
pH and Nutrients
Soil chemistry is a large subject, but two areas matter most for practical gardening: pH and the major nutrients. Understanding them doesn't require a chemistry background; it requires understanding why a plant can fail to absorb something that's physically present in the soil, and what to do about it.
What pH means
pH is a measure of acidity or alkalinity on a scale from 0 to 14, with 7 being neutral. Most garden vegetables grow best in a range of roughly 6.0 to 7.0, slightly acidic to neutral. Within this range, the major plant nutrients are most soluble and available for root uptake. Outside it, nutrients become chemically bound to soil particles and unavailable to plants, even when those nutrients are present in abundance. A plant in alkaline soil can show iron deficiency despite iron being present, simply because the pH prevents the plant from accessing it.
Adjusting pH
If your soil is too acidic, the standard amendment is garden lime (calcium carbonate), which raises pH gradually over several months. Dolomitic lime also adds magnesium alongside calcium, making it useful if a soil test shows magnesium deficiency alongside low pH. If your soil is too alkaline, elemental sulfur is the most reliable amendment for lowering pH, though it works slowly and is best applied well ahead of planting. Regular additions of organic matter tend to buffer pH toward a moderate range over time regardless of starting conditions.
The major nutrients
Plants need seventeen nutrients to complete their life cycles. Three are taken from air and water, carbon, hydrogen, oxygen. The remaining fourteen come from soil. Of those fourteen, three dominate fertiliser labelling and garden conversation:
- Nitrogen (N), drives leafy, vegetative growth. Deficiency shows as pale yellowing starting from older leaves. Excessive nitrogen produces lush foliage at the expense of fruit and root development and makes plants attractive to pests.
- Phosphorus (P), essential for root development, flowering, and fruit set. Deficiency often shows as purple or reddish tinting on undersides of leaves. Phosphorus binds tightly to soil particles and moves very little, so placement near the root zone matters.
- Potassium (K), regulates water movement within the plant, strengthens cell walls, and supports disease resistance. Deficiency shows as browning or scorching at leaf margins. Potassium leaches from sandy soils more readily than from clay.
Secondary and trace nutrients
Calcium, magnesium, and sulfur are needed in moderate amounts. Calcium deficiencies produce blossom end rot in tomatoes and tip burn in lettuce. Magnesium deficiency causes interveinal chlorosis, yellowing between leaf veins while veins stay green. Trace elements like iron, manganese, boron, and zinc are needed only in tiny quantities but can cause visible problems when absent. Most trace deficiencies in otherwise reasonable soil are pH problems in disguise rather than true absences of the element.
Amendments Explained
What Amendments Do and When to Use Them
An amendment is anything added to soil to change its properties, physical structure, chemistry, or biology. The category is broad, and the word is sometimes used loosely to mean fertiliser. These are different things. Some amendments add nutrients. Many improve structure without contributing meaningfully to fertility. Some do both. Knowing which is which prevents a lot of unnecessary spending and a fair amount of garden damage.
These amendments improve soil structure, feed soil biology, and add nutrients gradually as they break down. They are the foundation of long-term soil building and rarely cause harm through overuse.
Finished compost improves drainage in clay soils, improves water retention in sandy soils, adds a broad spectrum of nutrients in slow-release form, introduces beneficial microorganisms, and buffers pH. It is not a high-nitrogen fertiliser and should not be treated as one, but it supports soil fertility in ways that synthetic fertilisers do not replicate.
Work 5–10cm into the top layer of a new bed before planting. For established beds, apply 3–5cm as a top dressing in spring or autumn and let soil life incorporate it. There is no meaningful risk of over-applying well-finished compost to a garden bed.
Unfinished or hot compost can burn plant roots and may introduce weed seeds or pathogens. Finished compost should smell earthy, not sour or ammonia-like, and the original materials should no longer be recognisable. Compost from unknown commercial sources may contain contaminants, see the note on biosolids below.
Aged manure contributes nitrogen, phosphorus, and potassium alongside organic matter. Chicken manure is the richest in nitrogen; horse and cow manure are lower in nutrients but valuable for their bulk organic matter content. Aged manure improves soil structure and feeds soil biology similarly to compost.
Apply only fully aged manure, aged a minimum of six months, or composted. Fresh manure applied close to harvest can introduce E. coli and other pathogens onto edible crops. Apply in autumn for spring planting, or work into beds at least 90 days before harvest of fruiting crops and 120 days before harvest of root crops, leafy greens, and any crop where the edible portion may contact the soil.
Manure from animals treated with certain persistent herbicides, particularly aminopyralid and clopyralid used widely in hay production, can carry residues that stunt or kill broadleaf plants even after aging or composting. If you are sourcing manure from farms or stables, ask whether the hay used was treated with these chemicals. Effects can persist in soil for more than a year.
Worm castings contain a wide range of plant-available nutrients in forms that roots can access directly without further microbial breakdown. More significantly, they are rich in beneficial bacteria, fungi, and plant growth hormones. Small additions can have significant effects on seedling establishment and plant health out of proportion to their nutrient analysis on paper.
Mix into seed-starting compost at 10–20% by volume. Use as a planting hole amendment for transplants. Apply as a light top dressing around established plants. Worm castings are gentle enough to use in direct contact with roots and seeds without risk of burning.
Biochar is highly porous at the microscopic level, which gives it a very large surface area relative to its volume. This surface area provides habitat for soil microorganisms and increases the soil's capacity to hold water and nutrients. Unlike organic matter, which breaks down over months to years, biochar is extremely stable and persists in soil for centuries. Its effects on soil structure and microbial populations accumulate over time rather than degrading.
Biochar should be charged before use, mixed with compost, aged manure, or liquid fertiliser for several weeks to load its pore spaces with nutrients and microorganisms. Applied raw, it will initially absorb nutrients from the soil rather than contributing them. Apply at 5–10% by volume of the soil you are amending. It is not a substitute for organic matter but a long-term structural addition.
Biosolids are the nutrient-rich organic solids recovered from municipal wastewater treatment. They contain nitrogen, phosphorus, and organic matter and have been widely applied to agricultural land for decades as a cost-effective fertiliser substitute. They are used in some commercial compost products without always being disclosed on labels.
Biosolids concentrate whatever enters the wastewater system, including pharmaceuticals, microplastics, heavy metals, and PFAS compounds. PFAS in particular is a serious concern: because biosolids are applied repeatedly to the same land, PFAS can accumulate in soil over time to concentrations that affect crops grown there. Research into the long-term effects on soil and food safety is ongoing, but the available evidence is concerning enough to warrant caution for food gardens. For home growers, buying compost from known sources and avoiding products that include biosolids is a reasonable precaution.
Mineral amendments adjust soil chemistry, pH, specific nutrient levels, or trace mineral content, without contributing meaningfully to organic matter. They are targeted tools rather than general improvers.
Garden lime (calcium carbonate) neutralises soil acidity, raising pH toward the neutral range. It works slowly, effects may take several months to fully materialise, and should be applied well ahead of planting when possible. It also contributes calcium, a secondary macronutrient.
Apply based on a soil test result. Rates vary significantly with soil type, clay soils require more lime than sandy soils to achieve the same pH shift. As a rough guide, raising pH by one unit in average garden soil requires around 200–300g per square metre of ground limestone. Dolomitic lime (calcium-magnesium carbonate) is preferable if a soil test indicates magnesium deficiency alongside low pH.
Soil bacteria convert elemental sulfur to sulfuric acid, which lowers pH. The process is slow, several months in warm, moist conditions, and works best when applied well ahead of the growing season. The bacteria responsible are less active in cold or dry soil, so application in autumn for spring effect is the most reliable approach.
Over-acidification is possible with excessive application. Always work from a soil test and apply the minimum recommended rate, retesting before applying again. Sulfur applied at high rates can temporarily suppress soil biology.
Rock dusts, basalt, granite, glacial rock dust, introduce a broad spectrum of trace minerals that may be depleted from heavily cultivated soil. They release nutrients very slowly through weathering and are best understood as a long-term investment in mineral diversity rather than a fast-acting nutrient source. The evidence base is more mixed than for other amendments, but in soil that has been in continuous cultivation for many years, trace mineral replenishment makes biological sense.
Synthetic fertilisers are not amendments in the structural sense; they contribute nutrients without improving soil biology or physical properties. Understanding what they do and don't do clarifies when they're useful and when they're counterproductive.
Synthetic fertilisers deliver concentrated, water-soluble nutrients in forms plants can absorb almost immediately. They are effective at correcting acute deficiencies and producing rapid vegetative growth. For specific applications, a single season's production on poor soil, correcting a diagnosed deficiency; they are a legitimate tool.
Synthetic fertilisers bypass soil biology rather than working through it. Long-term reliance on them can reduce populations of soil microorganisms, reduce organic matter through increased biological activity without replacement inputs, and produce plants that are more pest-attractive due to rapid, soft vegetative growth. They do not improve soil structure and can cause salt accumulation in soil if over-applied. Using organic matter amendments as the primary fertility strategy and synthetic fertilisers only for specific, diagnosed deficiencies avoids these issues.
Composting
Making Your Own Compost
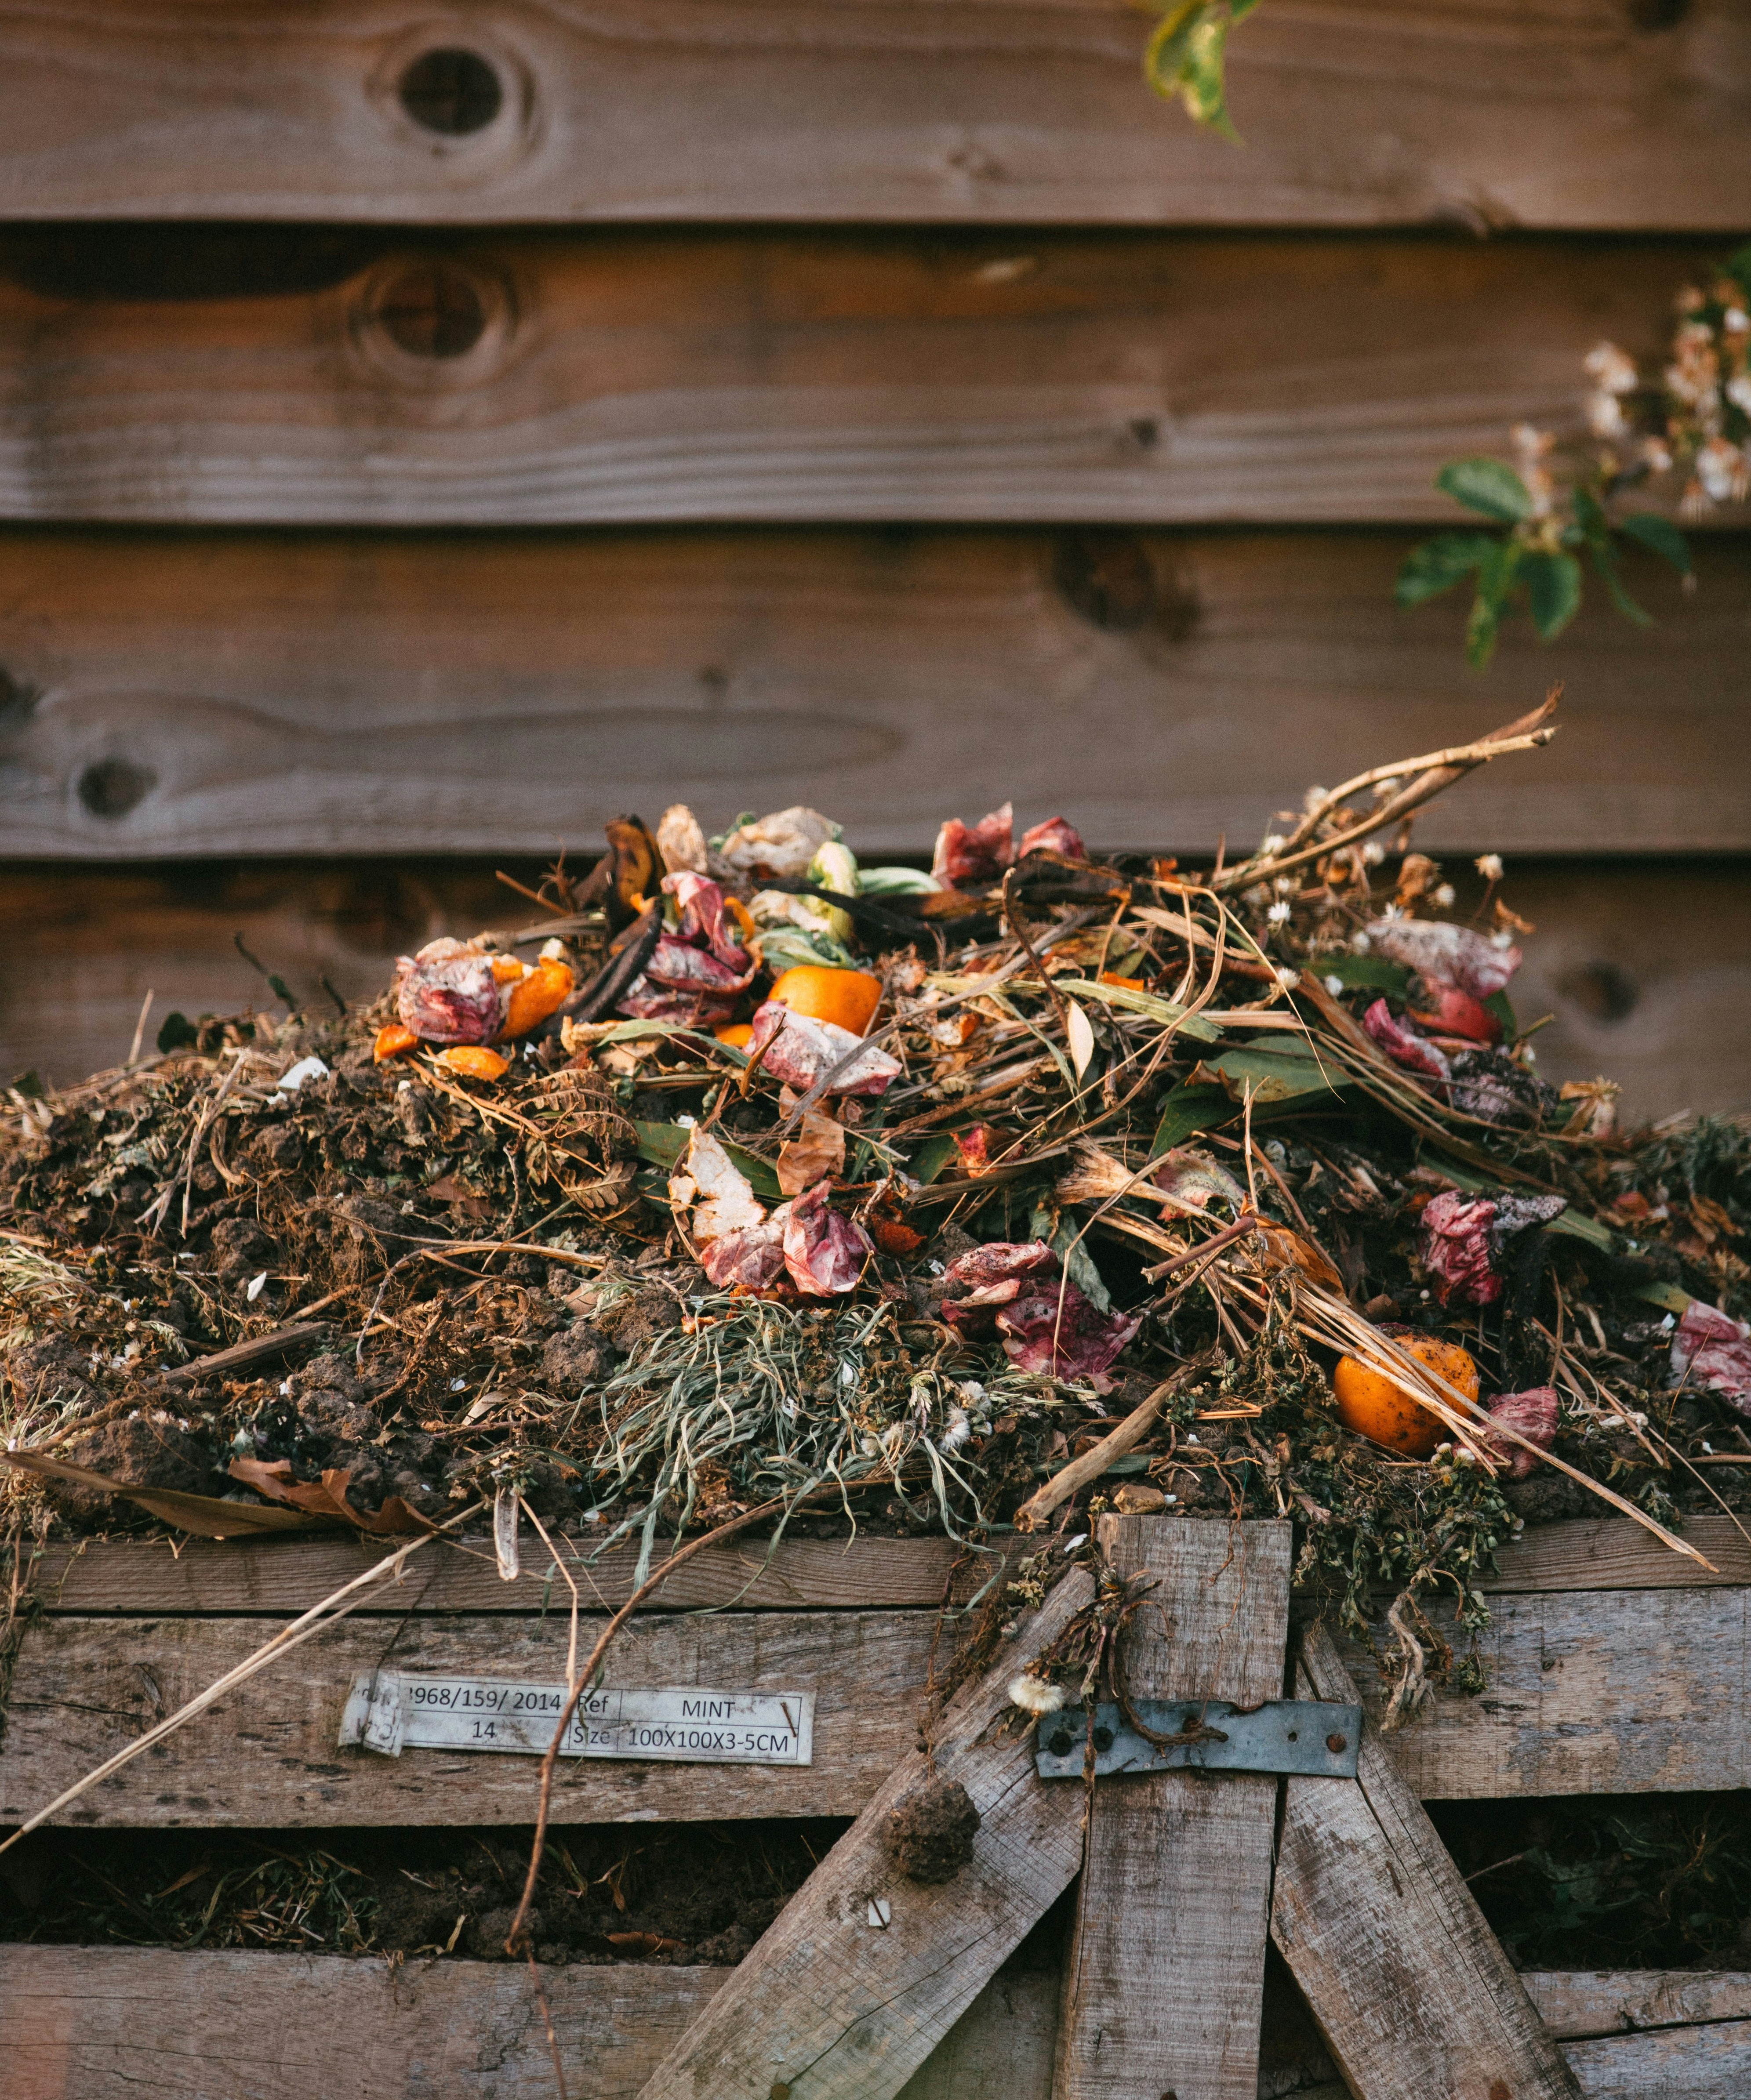
Composting is the controlled decomposition of organic material into a stable, nutrient-rich amendment. It is one of the most valuable things a gardener can do, converting kitchen and garden waste into the single most effective soil improver available, at essentially no cost. The process is not complicated, and it is forgiving of mistakes; organic matter breaks down whether or not you manage it well, and what good technique really buys you is speed and a more pleasant result. In effect you are taking the same decomposition that happens on any woodland floor and giving it a defined place to happen, with enough air, moisture, and variety of material to keep it working steadily rather than stalling or turning sour.
The end product, finished compost, improves soil structure, feeds the microbial community, buffers pH, and releases nutrients slowly over months. Nothing bought in a bag does all of these things at once, and nothing else lets you close the loop on the waste your kitchen and garden produce in the process. It is worth thinking of compost as a soil conditioner rather than a fertiliser, which is where a lot of confusion starts: it does supply nutrients, but its greater value is in what it does to the physical and biological life of the soil, holding moisture, opening up heavy ground, and feeding the organisms that make nutrients available to plants in the first place. There is also good evidence that well-made compost can suppress some soil-borne plant diseases, an effect that largely disappears when the compost is sterilised, which points to its living microbial community rather than any single nutrient as the cause. The sections below cover how to build a heap that works and how to tell when it is finished.
What composting requires
- Carbon and nitrogen, roughly three parts carbon (browns: dry leaves, cardboard, straw, wood chip) to one part nitrogen (greens: vegetable scraps, fresh grass, coffee grounds) by volume. Too much carbon slows the pile; too much nitrogen makes it wet and smelly.
- Moisture, the pile should feel like a wrung-out sponge throughout. Dry piles stall; waterlogged piles go anaerobic and smell.
- Air, aerobic decomposition is faster and produces better compost. Turning the pile introduces oxygen. A pile never turned still composts but takes much longer.
- Mass, a pile smaller than roughly one cubic metre lacks the insulating mass to generate and hold the internal heat needed for fast decomposition and weed seed kill.
- Particle size, smaller pieces decompose faster. Chipping or shredding woody materials speeds the process considerably.
What to compost and what to avoid
Most kitchen vegetable scraps, garden trimmings, coffee grounds, eggshells, cardboard, and paper can be composted. Avoid meat, fish, dairy, cooked food, and oily materials in open compost; they attract pests and create odour. Dog and cat waste should not go into compost destined for food gardens due to pathogen risk. Diseased plant material and weeds that have set seed are best kept out of cool or slow piles but are safe in a hot pile that reaches sustained temperatures above 55°C.
Cold composting vs hot composting
Cold composting means adding material as it becomes available and leaving it to break down at its own pace, typically six months to two years. It requires minimal effort and produces good compost but doesn't reliably kill weed seeds or pathogens. Hot composting involves building the pile all at once with attention to the carbon-to-nitrogen ratio, turning regularly, and monitoring moisture. A well-managed hot pile can reach 55–70°C internally and produce finished compost in four to eight weeks. Most home gardeners use a hybrid: a cold pile that's occasionally turned and managed loosely. It works well enough for most situations.
Knowing when it's finished
Finished compost is dark brown, crumbly, and smells like earth, nothing sharper. The original materials are no longer recognisable. A simple test is to seal a small sample in a bag for a few days: if it develops a sour or unpleasant smell when opened, it needs more time. Finished compost is stable and can be stored indefinitely without further degradation.
Composting
Worm Farming
Vermicomposting, which simply means composting with worms, is one of the most efficient ways to convert kitchen scraps into a high-quality soil amendment. It requires no outdoor space and produces no meaningful odour when managed correctly, which makes it as practical for a flat, a balcony, or a cupboard under the sink as it is for a garden. The worms do the work that heat and turning do in an ordinary compost heap, and they do it faster and at room temperature. That combination of speed, tidiness, and a small footprint is why a bin suits people who want good compost without the space a full outdoor system asks for. It also scales down gracefully in a way an outdoor heap does not, so a small household can run a small bin and simply feed it what it produces.
It yields two useful products, worm castings and liquid leachate, both of which benefit plants significantly. Castings improve soil structure and microbial activity, and because they pass through the worm rather than simply rotting down, they come out biologically active and gentle enough to use in direct contact with roots. Part of why castings work so well is not only their nutrient content: passing through the worm generates humic substances and plant-growth-regulating compounds that stimulate growth directly, and a meta-analysis of many trials found the effect was strongest when vermicompost made up roughly a third to a half of the growing medium. Leachate, diluted and applied as a liquid feed, is one of the more effective plant tonics available, though it needs to be used sensibly rather than poured on neat. None of this asks for special equipment or expense to begin with; a single lidded tub and a starter population of the right worms are enough, and the sections below cover how to set one up, what to feed it, and how to use what it produces.
How it works
A worm bin is a contained environment where composting worms, most commonly red wigglers (Eisenia fetida), not the earthworms found in garden soil, process organic material by eating it and excreting it as castings. The worms work through bedding material (shredded cardboard or paper) and food scraps, converting both into a dark, crumbly, biologically active end product in four to eight weeks depending on conditions and feeding rate. A well-established bin processes roughly half its worm weight in food scraps per day.
Setting up a bin
A basic worm bin can be as simple as a lidded plastic tote with drainage holes drilled in the base and air holes along the upper sides. Fill it with damp shredded cardboard or paper as bedding; it should feel like a wrung-out sponge, add a starter population of red wigglers, and begin adding food scraps in small amounts, buried beneath the bedding. Purpose-built stacking worm farms are more convenient for harvesting castings but not meaningfully more effective. Keep the bin somewhere with stable temperatures between 15–25°C; worms slow significantly below 10°C and die above 35°C.
What to feed and what to avoid
Vegetable and fruit scraps, coffee grounds, tea leaves, crushed eggshells, and shredded paper all work well. Feed in variety rather than large quantities of any single material, a bin fed exclusively on citrus or onion scraps will become acidic and stress the worms. Avoid meat, fish, dairy, oily cooked food, and anything heavily salted. Add shredded cardboard regularly to balance the moisture and nitrogen from food scraps; a bin that becomes wet and sour needs more carbon material and less food until it stabilises.
Using castings and leachate
Finished castings can be used in the same ways as worm castings bought from a supplier, worked into planting holes, mixed into seed-starting media, or top-dressed around established plants. They are gentle and will not burn roots even in direct contact. The liquid that drains from the base of the bin, leachate, can be diluted at roughly ten to twenty parts water to one part leachate and used as a liquid feed, though its composition is variable. Actively aerated compost tea brewed from finished castings is more consistent and biologically active if you want a reliable liquid product.
Surface Management
Mulching
Mulch is any material laid on the soil surface to protect and improve it, from straw and wood chips to leaf litter, compost, or gravel. The principle is simple, but the choice of material has real consequences for how a bed performs, how fast it improves, and what it looks like. A mulch works mainly by covering bare ground, and bare ground is the exception in nature rather than the rule; almost anywhere soil is left uncovered it either grows something or slowly loses structure, moisture, and life to sun and rain. Laying mulch gives cultivated ground the same protection that fallen leaves and spent stems give an undisturbed woodland or meadow. The effect on water is substantial: by shading the surface and slowing evaporation, an organic mulch such as straw can cut the water a soil loses to the air by roughly a third, and the same covering moderates soil temperature, smoothing out the daily and seasonal swings that bare ground is fully exposed to.
Different mulches do different things, and knowing what each one contributes helps you choose for your situation rather than defaulting to whatever is cheapest or nearest to hand. Some, like straw and leaf mould, break down quickly and feed the soil as they go, which suits vegetable beds that are replanted often. Others, like bark and wood chips, last far longer and sit better around trees, shrubs, and paths, where a stable surface matters more than a fast return of nutrients. A few, such as gravel or woven fabric, do not feed the soil at all and are chosen for weed suppression or appearance. The sections below go through the common options and what each is best suited to, so the material can be matched to the bed rather than the other way round.
What all mulches do
Any mulch applied at adequate depth, typically 5–10cm, suppresses weeds by blocking light, reduces moisture loss from the soil surface, moderates soil temperature, protects soil structure from rain compaction, and provides habitat for ground-level beneficial organisms. These benefits accrue regardless of the specific material. The differences between mulch types are in what they add as they decompose, how fast they break down, and how they affect the immediate soil environment beneath them.
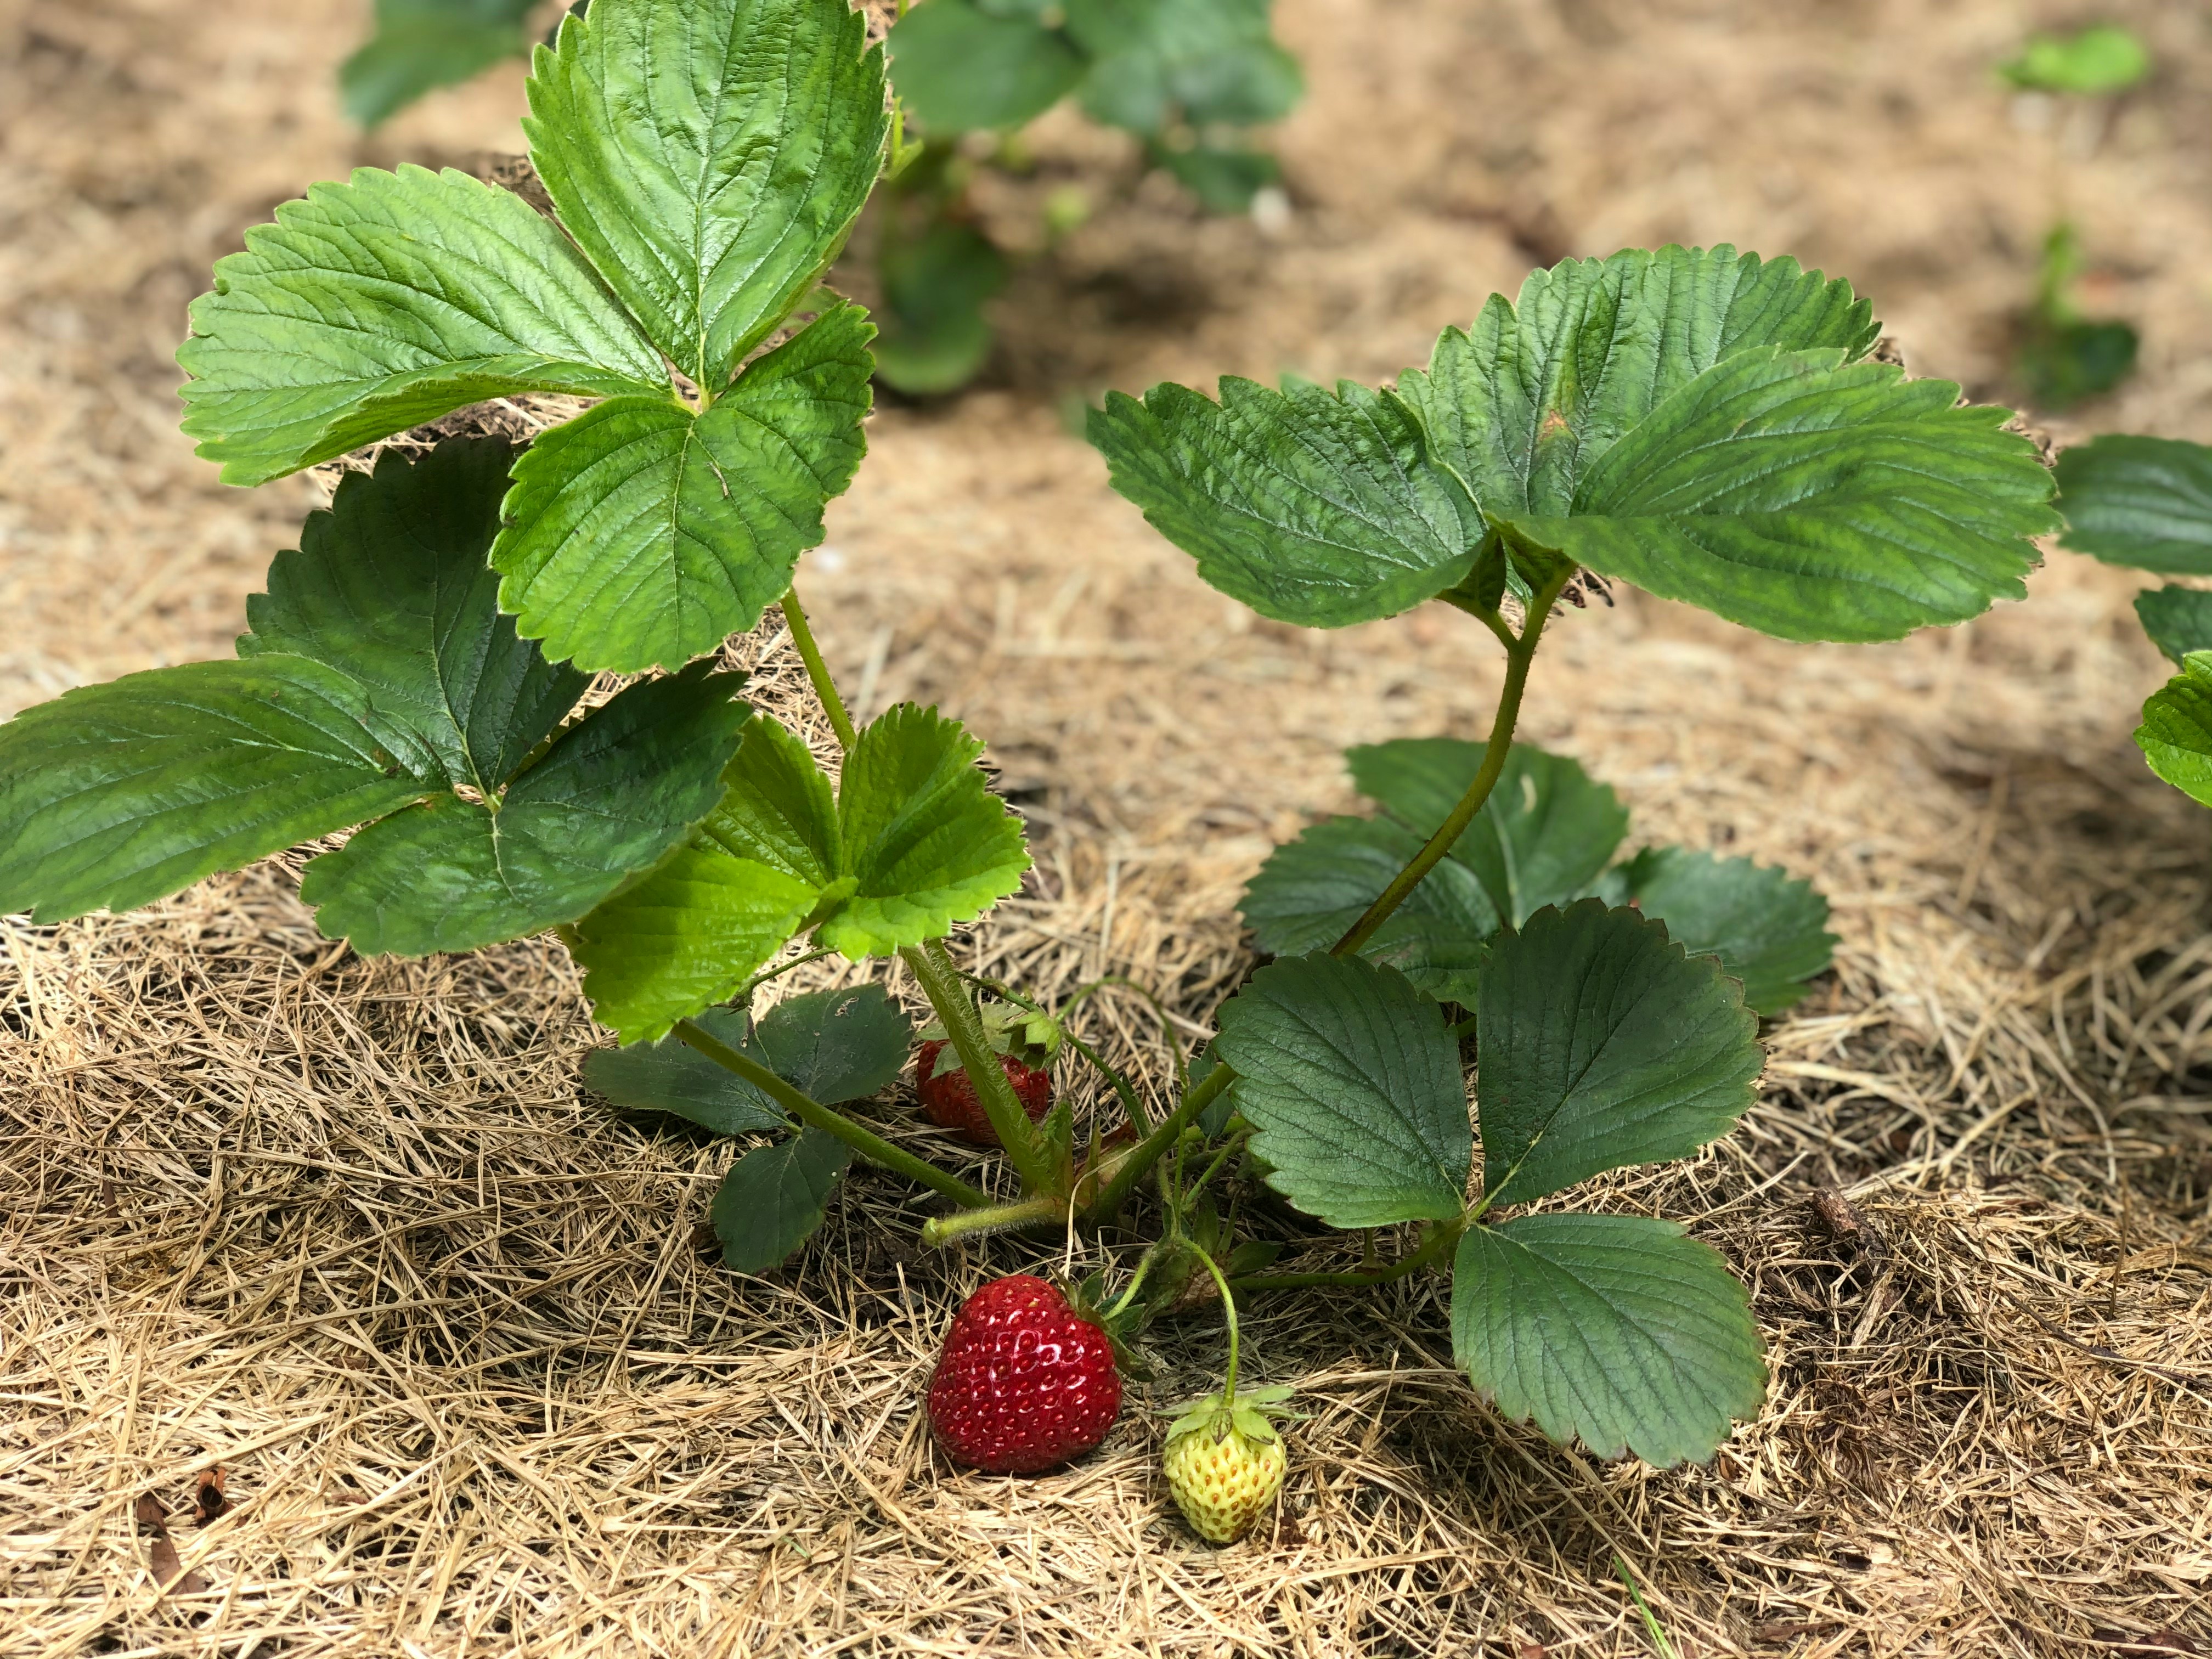
Straw
Straw, the dry stalks left after grain harvest, distinct from hay, is one of the most useful mulches for vegetable beds. It is light, easy to apply and move, breaks down over one to two seasons adding organic matter, and allows water to pass through freely. It suppresses weeds effectively without creating the nitrogen competition that wood-based mulches can cause near actively growing crops. Ensure you source straw rather than hay, hay contains seed heads that will germinate prolifically. Also check the herbicide history of the source crop, as some persistent herbicides survive in straw and can damage broadleaf plants.
Wood chip
Wood chip is the best long-term mulch for paths, fruit trees, and perennial beds. It breaks down slowly, over two to four years, and as it does, creates ideal conditions for fungal networks that benefit woody plants and perennials. Applied fresh from an arborist, it is very high in carbon and should not be incorporated into the soil or applied directly against stems; it is a surface mulch only. Fresh wood chip temporarily ties up nitrogen at the point where it contacts soil as it decomposes, which matters for annual vegetable beds but is negligible for established perennials and trees. Aged wood chip that has begun to darken does not carry this issue.
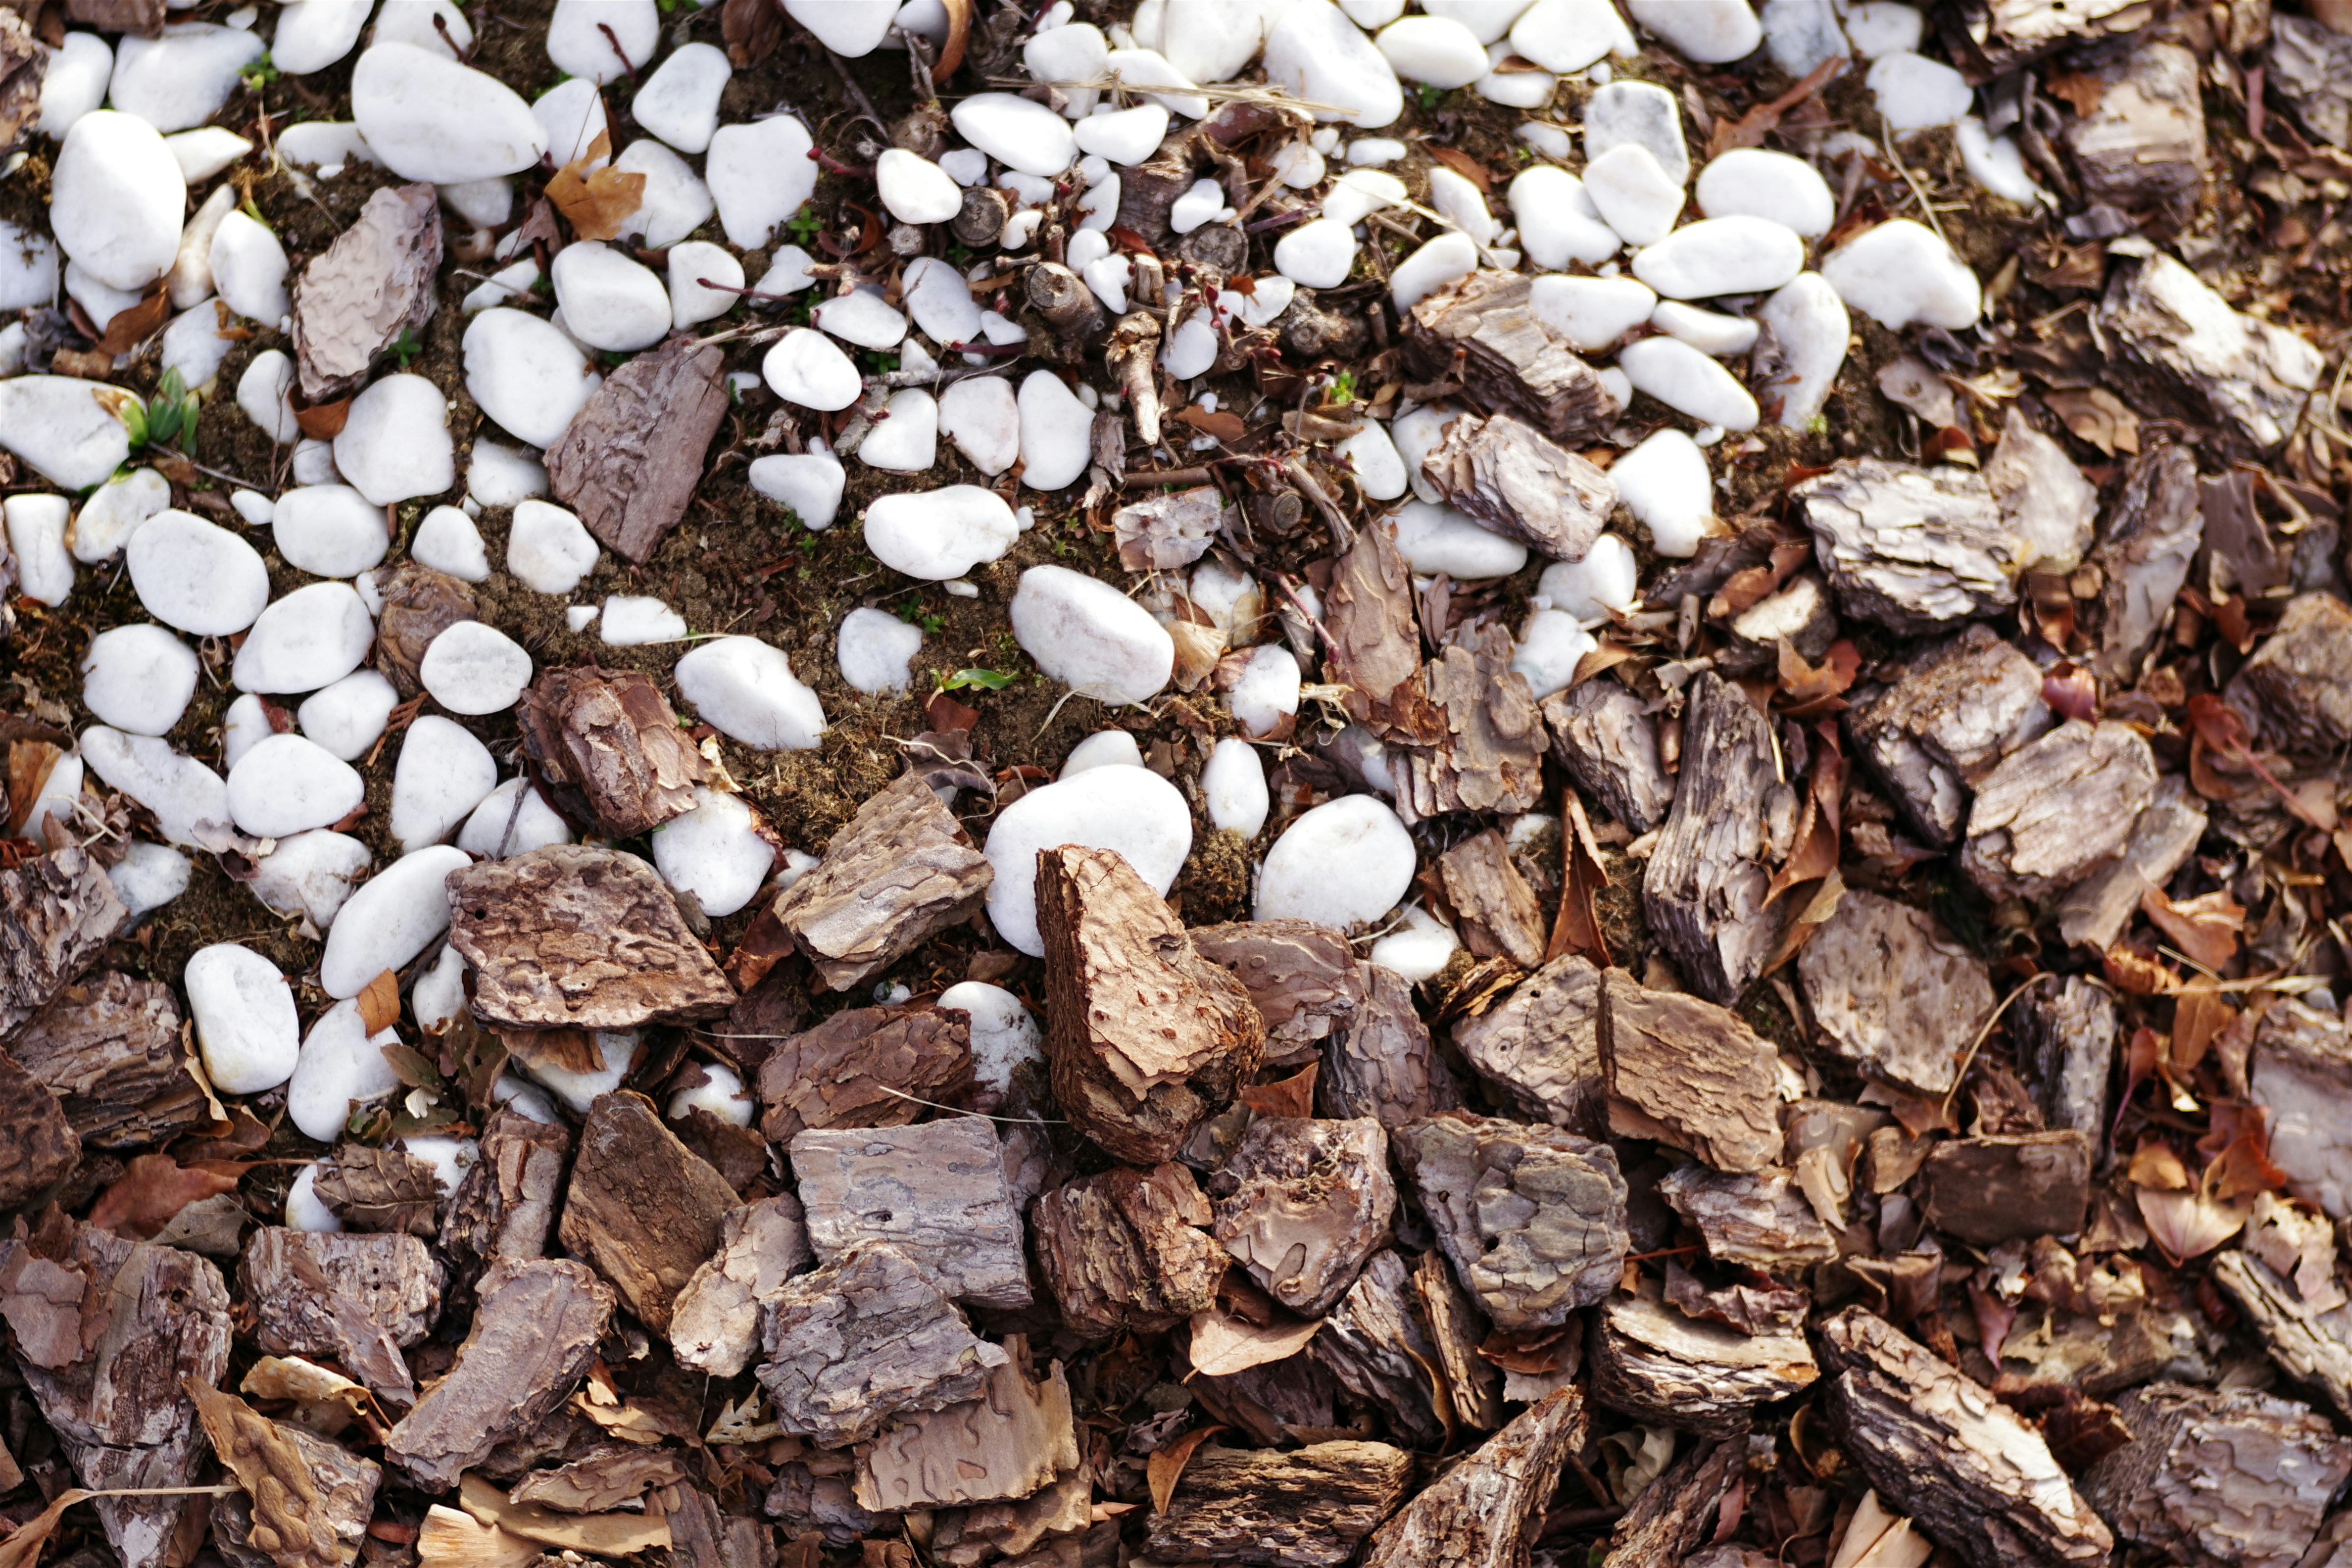
Bark and decorative mulches
Bark mulch and ornamental chipped bark are widely sold but contribute less biologically than wood chip, straw, or leaf mould. Dyed bark mulch may contain synthetic colourants with uncertain soil effects and is best avoided for food gardens. Fine bark is useful for aesthetic areas but tends to compact and shed water rather than absorb it if applied too thickly.
Leaf mould
Partly or fully decomposed leaves used as a mulch combine the weed suppression of a surface mulch with direct soil improvement, leaf mould breaks down into the topsoil quickly, feeding biology and improving structure simultaneously. It is the most biologically generous mulch available to most home gardeners and costs nothing beyond the time to collect and stack autumn leaves. Used as a 5–8cm mulch over beds in autumn, it effectively disappears into the soil by spring, at which point another layer can be added or the bed planted directly.
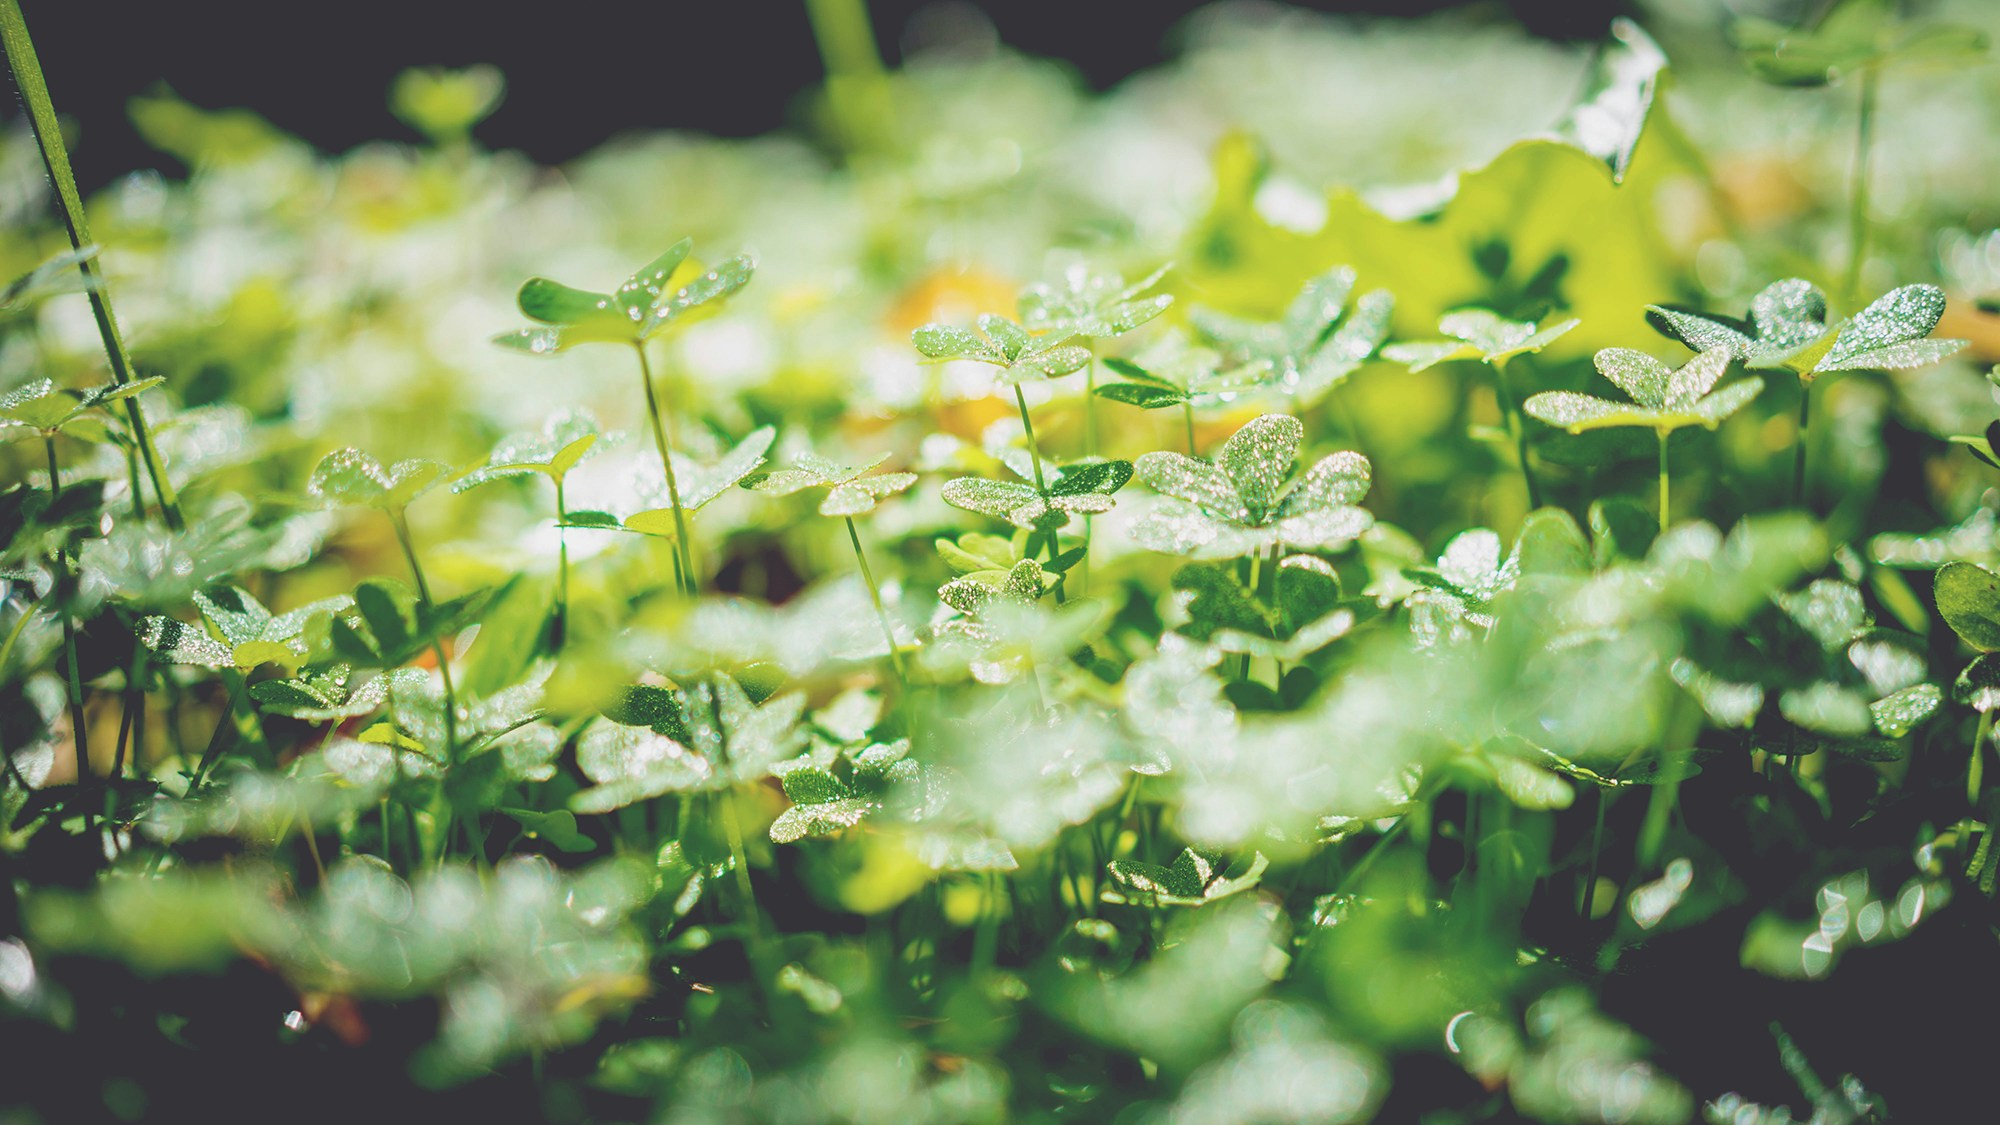
Living mulch
A living mulch is a low-growing plant grown intentionally between taller crops to cover the soil surface. Clover is the most useful; it fixes nitrogen through root nodule bacteria, and when cut down or incorporated the decaying roots release that fixed nitrogen into the soil for following crops to use. Creeping thyme and low-growing herbs work in perennial beds. The trade-off is competition for water and nutrients with the main crop, which means living mulches are most appropriate in beds where main crops are well-established or where water is reliably available. In dry summers they may need to be cut back or suppressed to prevent excessive competition.
Water Management
Watering and Soil Health
How you water affects the soil as much as what you add to it. Watering habits determine whether soil structure holds or degrades, whether biology thrives or stalls, and whether nutrients stay available or leach away. Getting this right doesn't require precision; it requires understanding what the soil and plants are actually responding to.
The problem with overwatering
Overwatered soil stays saturated long enough to drive out the oxygen that roots and soil organisms need. In waterlogged conditions, aerobic bacteria, the primary decomposers driving nutrient cycling, are replaced by anaerobic bacteria that produce byproducts toxic to plants, including hydrogen sulfide, which smells of rotten eggs and is a reliable indicator of chronically wet, poorly aerated soil. Root function deteriorates, nutrient uptake stalls, and disease pressure from water moulds and root rots increases. The damage from overwatering is often misread as underwatering or nutrient deficiency, because the symptoms, wilting, yellowing, look similar.
The problem with surface watering
Frequent light watering wets only the top few centimetres of soil, which encourages roots to stay near the surface where they are vulnerable to heat, drought, and disturbance. It also promotes the growth of mosses and algae on the soil surface, which can seal the surface against water infiltration over time. Infrequent, deep watering, enough to wet the soil to 20–30cm, encourages roots to follow moisture downward, producing deeper, more resilient root systems and better drought tolerance. The soil surface can dry out between waterings without harm to the plant if the deeper root zone stays adequately moist.
Rain impact and surface compaction
Heavy rain falling directly on bare soil dislodges surface particles and seals the topmost layer, a phenomenon called surface sealing or capping. Capped soil sheds water rather than absorbing it, leading to run-off that carries topsoil and nutrients away and reduces infiltration even during subsequent dry periods. Mulch and ground cover break the energy of raindrops before they reach the soil, preventing this entirely. This is one of the clearest illustrations of why keeping soil covered matters even in climates where rainfall is welcome.
Irrigation approaches
- Drip irrigation, delivers water slowly at the root zone, with minimal surface wetting. Reduces fungal disease on foliage, reduces evaporation, and can be run through a timer for consistent deep watering with no labour. The most water-efficient approach for beds.
- Soaker hoses, similar principle to drip, useful for row crops and densely planted beds. Less precise placement but simpler to set up. Degrade faster than drip systems but cost less initially.
- Overhead watering, convenient but wets foliage and soil surface, increasing fungal disease risk and evaporative loss. Fine for establishing transplants and germinating seeds. Better done in the morning so foliage dries quickly.
- Hand watering, the most responsive approach: you observe the soil and plant before deciding to water. The risk is inconsistency. A simple wooden skewer pushed into the soil to 10cm tells you quickly whether the root zone is still moist, if it comes out clean and dry, water; if it comes out with soil clinging to it, the root zone is adequately moist.
Water and nutrient leaching
Excess water carries soluble nutrients, particularly nitrogen, downward through the soil profile and out of the root zone. Sandy soils are most vulnerable because they hold less water against drainage. Regular moderate watering retains more nutrients in the root zone than occasional heavy watering that saturates and drains the profile. Mulch significantly reduces the amount of watering needed by cutting evaporation, which in turn reduces both water use and nutrient leaching.
Observation
Reading Your Soil
A soil test gives you chemistry. Observation gives you context. Learning to read what you see in and around your soil, the organisms present, the structure, the surface, the weeds, gives you information that no laboratory panel captures, and it costs nothing beyond attention.
Earthworms
Earthworm presence and abundance is one of the most reliable indicators of soil health available to a gardener. A spadeful of healthy topsoil should disturb several earthworms, in very good soil, a dozen or more. Their absence in soil that appears otherwise reasonable suggests compaction, very low organic matter, excessive acidity, or recent chemical disturbance. Count them loosely when you dig; the trend over years is more informative than any single observation. Populations that grow year over year as you add compost and reduce disturbance confirm that what you're doing is working.
Soil colour
Dark soil generally contains more organic matter than pale soil of the same type. The comparison only holds within a soil type, dark clay is not directly comparable to pale sandy loam, but tracking whether your soil is getting darker over years of amendment is a useful proxy for organic matter accumulation. Very black soil in wet climates may indicate excessive organic matter accumulation under anaerobic conditions rather than good fertility. Reddish or orange mottling in a soil profile suggests periods of waterlogging where iron has oxidised; consistent grey patches within otherwise brown soil indicate chronically poor drainage.
Structure and crumb
Pick up a handful of moist (not wet) soil and squeeze it, then open your hand. Healthy soil with good structure should hold together briefly and then crumble when poked; it forms aggregates rather than a dense lump or a pile of loose particles. Soil that forms a hard, shiny ball that doesn't crumble is high in clay with poor structure. Soil that falls apart completely without cohering at all is either very sandy or very dry. The ideal, small, irregular crumbs that hold together but break apart easily, is called good tilth, and it's the result of organic matter, biological activity, and appropriate moisture holding soil particles in loose aggregates.
Surface crust and compaction
A hard crust on bare soil after rain indicates surface sealing from rain impact, cover it. Soil that is very difficult to push a finger into at 5cm depth when moist is compacted; roots will struggle and water will puddle rather than infiltrate. Compacted soil often has a greasy or dense feel when wet and becomes very hard when dry. The solution is organic matter addition and reduced foot traffic; in severe cases, a single deep fork to break the hardpan, followed by mulching and no further disturbance.
What weeds tell you
Weeds are often dismissed as a nuisance, but they are specific to conditions in a way that makes them useful indicators. Docks and nettles tend to appear where nitrogen is high, often from manure, compost, or decomposing organic matter. Plantain and creeping buttercup colonise compacted soil that drains poorly. Sorrel is a reliable indicator of acidic soil; foxglove tends to favour acidic, disturbed ground but is less consistent as a pH signal on its own. Chickweed thrives in fertile, moist, well-structured soil, its presence in abundance is actually a good sign about soil quality even though it's a vigorous competitor. Thistles and docks with deep taproots are often breaking up compaction and pulling up subsoil minerals, doing structural work the gardener hasn't. None of these are perfect diagnostics, but weeds growing persistently in the same spot despite removal are usually responding to a soil condition rather than arriving randomly.
Fungal threads
White threads visible when you turn compost, disturb mulch, or break apart soil aggregates are almost always fungal mycelium, the vegetative body of soil fungi. Their presence is positive: they are decomposing organic matter, building soil structure, and potentially forming symbiotic connections with plant roots. The exception is very thick, leathery white sheets under wood chip or mulch, which may indicate honey fungus (Armillaria), a pathogenic fungus that attacks woody plant roots. Thin, wispy white threads throughout decomposing material are entirely beneficial and worth looking for as a sign of active biological life.
Long-Term Practice
Building Soil Over Time
The practices that build soil health compound. A bed improved for three years behaves differently from one improved for ten. The fundamental shift is from a mindset of inputs, what do I add to get a result this season, to one of systems: what habits, consistently maintained, build the kind of soil that reduces inputs over time.
Keep soil covered
Bare soil is exposed to several forms of damage: erosion from rain and wind, temperature extremes that stress and kill soil organisms, drying that disrupts microbial activity, and surface compaction from rain impact. Mulch addresses all of these. Straw, wood chips, leaf mould, or even living ground cover protect the soil surface while decomposing slowly and adding organic matter. Beds that are never left bare tend to improve faster and require less water.
Minimise disturbance
Every tillage event disrupts fungal networks, kills earthworms, and exposes organic matter to rapid oxidation. Deep digging made sense as a way to break up compacted soil, but once structure is established, maintaining it requires reducing disturbance rather than increasing it. No-dig or minimal tillage approaches preserve what the soil organisms have built. New beds can be established using cardboard sheet mulching, laying cardboard over grass or weeds, topping with compost, and planting directly into the compost layer, without any digging at all.
Rotate and diversify
Growing the same plant family in the same location year after year depletes specific nutrients, encourages specific pest and disease populations, and produces a less complex root-zone biology. Rotating plant families across beds each season breaks these cycles. Growing a diverse range of species simultaneously, rather than monoculture blocks of single crops, supports a more varied soil biology and tends to reduce pest pressure. Roots of different depths access different soil layers and leave different residues behind.
Cover crops
A cover crop is any plant grown specifically for its effect on the soil rather than for harvest. Legumes like clover, vetch, and field beans fix atmospheric nitrogen through symbiotic bacteria that colonise their root nodules, leaving it available for the following crop. Grasses and cereals produce large volumes of organic matter and deep roots that break up compaction. Brassicas like mustard have mild biofumigant properties that can suppress soil pathogens. Growing a cover crop over winter in an otherwise bare bed adds organic matter, prevents erosion, suppresses weeds, and keeps soil biology active during months when it would otherwise stall.
The slow approach to poor soil
If you are starting with poor soil, compacted clay, exhausted sandy loam, soil that has been in intensive vegetable production for years without amendment, the realistic timeline for meaningful improvement is two to four years of consistent practice. Add compost every season. Mulch between plants. Disturb the soil as little as possible. Grow cover crops in the off-season. Test the soil every year or two to track what is changing. Results compound quietly and the improvements tend to feel sudden when they arrive, even though they have been building all along.
Know Your Soil
Testing Your Soil
Everything in this page describes what soil can be and how it works. What your soil actually is depends on where you live, what the land has been used for, and how it has been managed. The only way to know is to look.
What a soil test tells you
A standard soil test from a laboratory will give you pH, levels of the major nutrients (nitrogen, phosphorus, potassium), and often calcium, magnesium, and organic matter content. Some tests include micronutrients. Most include amendment recommendations based on the results, which makes them more useful than trying to interpret numbers against general guidelines. A test will tell you what your soil has, what it lacks, and approximately what to add.
What a soil test doesn't tell you
Standard fertility tests do not screen for contaminants. If your soil may have been exposed to lead paint from old buildings, runoff from industrial land, PFAS from biosolid applications, or pesticide residues from prior agricultural use, a separate contaminant screen is needed. This matters most for urban gardens on land with unknown prior use, and for anyone near former industrial sites, military land, or farms that received heavy biosolid applications. The companion page on growing with minimal contaminant exposure covers this in more detail.
How to take a good sample
A single scoop from one spot is not representative. For a bed or plot, take eight to ten small cores from across the area, each about 15–20cm deep, remove any surface debris, mix them together, and send a portion of that combined sample to the lab. Most labs need only a few hundred grams. Sample when the soil is moist but not waterlogged and not just after fertiliser application, which would skew the results. Label each sample clearly, if you have multiple beds with different histories, test them separately.
When to test
Test before starting a new growing area, once you know your baseline, subsequent tests become more informative. Retest every two to three years thereafter, or whenever you are making significant changes to management. Autumn is a good time for testing in most climates: the season's crops have been removed, amendments can be applied over winter, and there is time for adjustments to take effect before spring planting.
Where to get a test done
University extension programs in many regions offer low-cost soil testing and provide recommendations tailored to your local conditions. These are often the best value and most locally relevant option. Commercial labs also offer testing at various price points. Avoid cheap home test kits for anything beyond a rough initial estimate of pH; they are not accurate enough to base amendment decisions on. When choosing what to test for, let your situation guide you: a new urban plot warrants a contaminant screen; a garden with persistent yellowing warrants a micronutrient panel; a new plot with unknown history warrants both.